

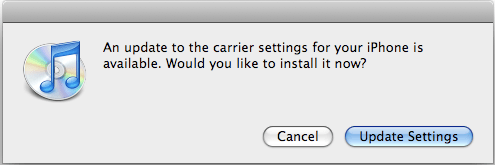
One of my favourite things about the iPhone is that it’s fairly painless to throw another SIM card into your iPhone, and have all of your carriers settings just work (internet, MMS, voicemail, and tethering if your carrier allows it). The way this magic works is that Apple actually has the settings for all of the official iPhone carriers preloaded into iOS. If you throw in a SIM from a supported carrier, the settings are simply loaded and away you go. These are referred to as carrier bundles (or, carrier settings according to Apple).
Carrier settings updates are small files (about 10 kb) that are installed on your iPhone or iPad (Wi-Fi + Cellular models). Carrier settings include updates to Access Point Names (APNs), MMS settings, features such as tethering, and default apps such as Stocks, Maps, and Weather.
On your iOS device, they live at
/var/mobile/Library/Carrier Bundles/ – bundles that have been updated with iTunes, or pushed over the air
/System/Library/Carrier Bundles/ – stock bundles that ship with iOS
On your computer side, they can be found at
~/Library/iTunes/iPhone Carrier Support/
If you haven’t ever had iTunes prompt you about a carrier update, this folder probably won’t exist.
Carrier bundles themselves are simply .zip archives, but with a .ipcc extension instead. They’re named after your carrier, and may also say whether they’re for your iPhone or iPad (Telstra_au_iPhone.ipcc)
Inside, the layout looks much like this;
\Payload\
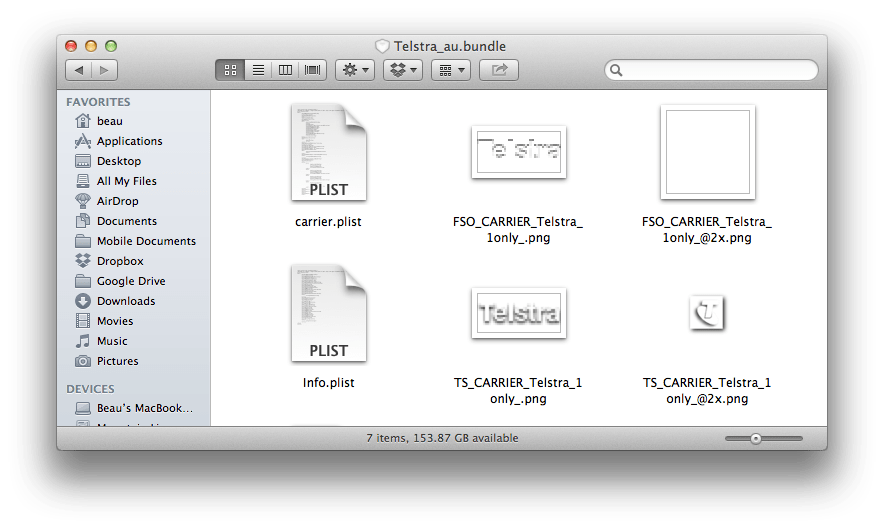
\CarrierName_au.bundle\
\carrier.plist - carrier settings go here
\Default_CARRIER_CarrierName.png - (deprecated in iOS 6)
\FSO_CARRIER_CarrierName.png - logo for black statusbar
\TS_CARRIER_CarrierName.png - logo used inside Notification Center dropdown
\Info.plist - bundle description
\Version.plist - bundle version details
Out of the box, iTunes will not usually allow bundles to be sideloaded onto an iOS device. To make iTunes play nice, it’s easily fixed
For Mac OS X; open up Terminal.app and paste in the following;
defaults write com.apple.itunes carrier-testing -bool true
For Windows, open up Run (Winkey+R) and paste the following;
"%ProgramFiles%\iTunes\iTunes.exe" /setPrefInt carrier-testing 1
If you’re running Windows x64 bit, do this instead:
"C:\Program Files (x86)\iTunes\iTunes.exe” /setPrefInt carrier-testing 1
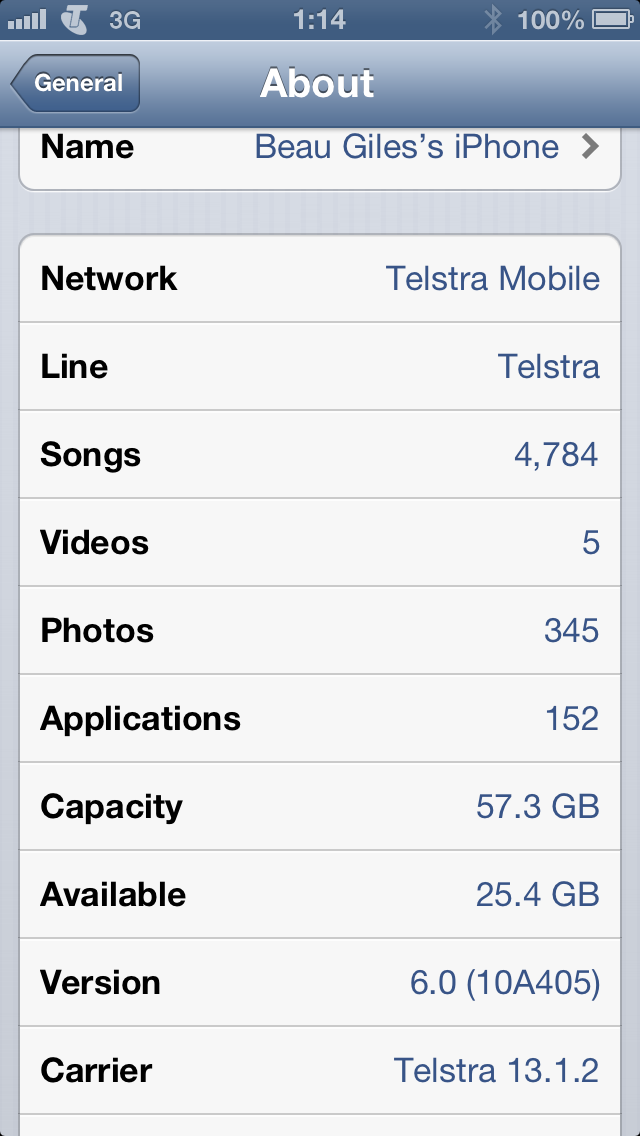
Carriers can also push updates over the air – no need to tether your computer to iTunes to get updates. Your iOS device will check every several days for updates, or you can also force a check by going to Settings > General > About and waiting several seconds.

Unfortunately, the only ‘editable’ part of a carrier bundle as of iOS 4 are the carrier logos. Originally, it was possible to make your own bundles from scratch and configure everything; carrier name, MMS, voicemail, and APNs. APNs began to be signed in iOS 3.1, after tethering was introduced and people were configuring their own APNs to enable tethering without the support of their carrier (and get tethering for free if your carrier charged for it, such as AT&T).
iOS 4 then introduced signing the whole carrier.plist file – no changes could be made, and any that were would only take effect on a jailbroken phone with ‘commcenter’ patched to bypass signature checks. Luckily – the logos are still fair game. It’s the most customisation you can do on your stock iPhone without jailbreaking! You can check out my own custom carrier bundles here.
It’s easy to tweak and customise your own bundle with your logo and then push it to your phone. It just takes a bit of time and patience. The main drawback is not being able to go back to the original stock logo without restoring.
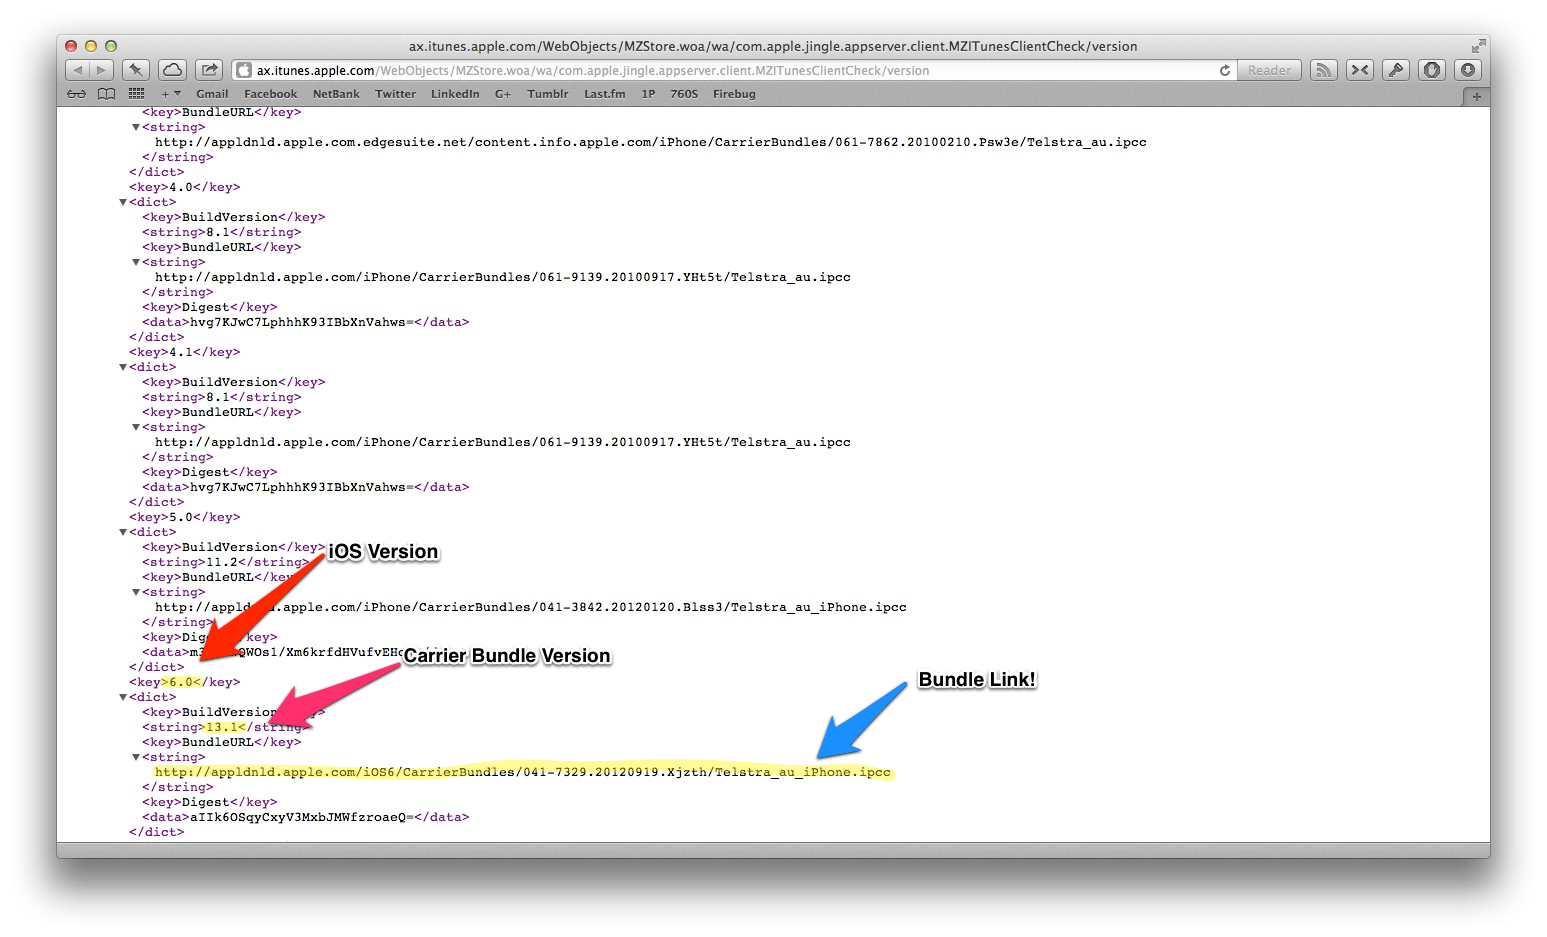
First, you need to get your hands on your ‘stock’ carrier bundle. If you’re lucky enough to have received an update over the air, you can find them on Apple’s server by looking in this XML file.
Do a quick search to find your carrier and see if a bundle is available.
If you can’t find a version for your carrier, they haven’t pushed an update over the air and you can only find your bundle inside iOS. Unfortunately you’ll need a jailbroken phone to get the bundles from here.
Once you’ve got your carrier.ipcc, unzip and open Carrier.bundle.
You can throw your own logos in here; you’ll need to follow the same naming structures. There’s no need to overwrite the existing FSO_CARRIER_CarrierName.png and TS_CARRIER_CarrierName.png either – since this works best on retina devices, just add @2x to the end of the filename. (eg, FSO_CARRIER_CarrierName@2x.png) – as such, you’re not replacing the logo in the bundle, just adding more to it. iOS will use @2x files on a retina device if available)
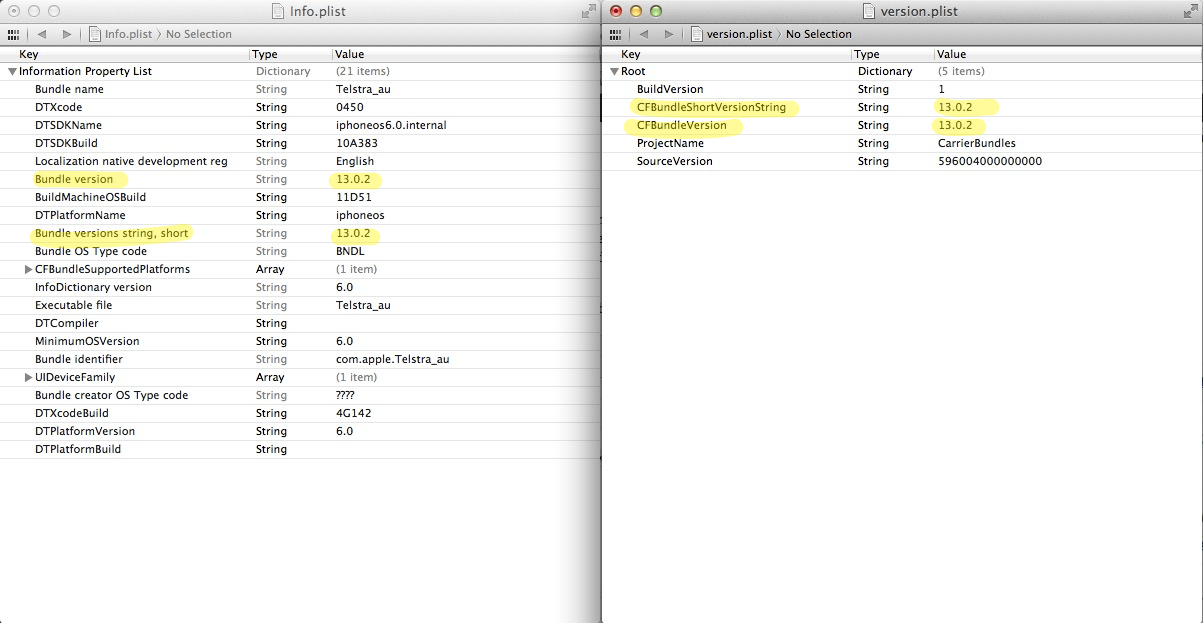
After adding your own images, you’ll also need to bump the version number so iOS will accept it. You’ll need a property list editor (If you have Xcode installed, you’re already set) and open up Info.plist and Version.plist
For Version.plist and Info.plist, you’ll need to edit the following;
- CFBundleShortVersionString
- CFBundleVersion
If the current value is 13.0 for example, you just need to bump it to 13.0.1. If you then want to make more changes and push it back, bump it to 13.0.2 and so on.
Now you’ve cooked up your perfect bundle, you just need to put it back inside the ‘Payload’ folder, zip it back up, rename to yourcarrier.ipcc, and push it on with iTunes. Easy!
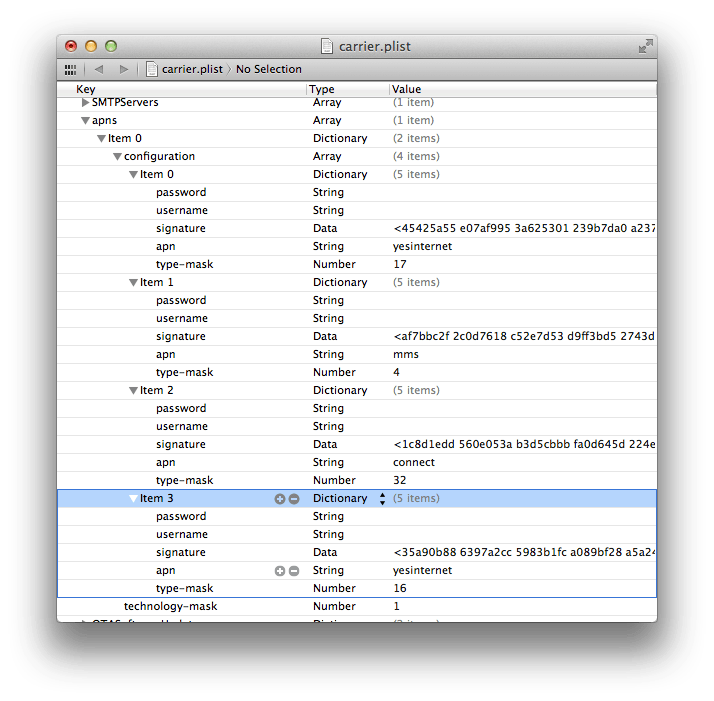
Unfortunately, all of the exciting settings are in Carrier.plist which can’t be edited without a jailbreak.

Carriers get to dictate many exciting settings – how many people you can call at once, whether the carrier can set the time on your device, whether the 3G or LTE toggle shows, and they can also allow software updates over the air if so desired – presumably disabled to prevent any potential billshock events.
They also dictate whether you’re able to edit any APNs yourself, and which APNs you can edit. Telstra only allows the tethering APN to be edited.
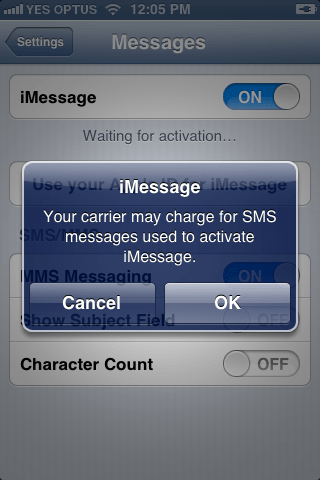
iMessage and FaceTime use SMS for activation, and to verify your phone number. Some carriers like Telstra operate their own local (+61) number for activations, and others rely on Apple’s international service (+44). As such, your carrier can also warn you about any potential charges.
Carriers also dictate what traffic uses which APN – for carriers where tethering requires payment; tethering traffic simply uses a different APN that isn’t enabled until you’ve paid. (eg, mobile data may use the ‘internet’ APN, and tethering may use ‘tether’). In Australia, Telstra uses telstra.wap for all internet traffic. Optus has different APNs for tethering and mobile data. This is an issue if you’re a MVNO customer for example – Optus dictates that ‘connect’ must be used for tethering, but your MVNO may use ‘internet’. Unfortunately you of course cannot edit these APNs.
To be clear here – it is the carrier actively controlling this – Apple themselves do not prevent tethering, but give carriers the controls to do so. Unfortunately customers end up missing out.
If you’re interested in what else is available, there’s a great page on The iPhone Wiki on what’s inside Carrier.plist.
I’m not entirely sure just adding PNGs to the IPCC will show up on the iOS device. There’s something about reversing the alpha channel of the PNGs to make them compatible with iOS devices, I don’t remember exactly – long time ago 🙂
I tried it with my local carrier but it did not work.many ways with 3 computers and still no hope
Is there anything special with australian carriers ipcc settings?
Does the blank logo replace the text for carrier name?
Heya, Beau! I’ve been trying this diligently to no avail…when I type it into the text field on my PC, I get the following message error:
Windows cannot find ‘”C:\Program Files (x86)\iTunes\iTunes.exe” /setPrefInt carrier-testing 1’. Make sure you typed the name correctly, and then try again.
What am I doing incorrectly?
PLEEEAASSE Help!!! (Email me directly at minnamines7@gmail.com if you are able.)
Cheers!
Melissa